I have decided to host my blog on my own server using the WordPress software platform. This blog will no longer be kept up to date.
Please visit my new blog at www.tkrphoto.com.
Thursday, May 15, 2008
Monday, April 7, 2008
Things
I wanted to make a short post to inform Mac OS X users of a really cool program that Ben Willmore told me about at PSW. It is called "Things" and can be found at the Cultured Code website.

Basically, it is a project / task management software that is relatively easy and intuitive to use. I've been using Main.app to handle my task management but it is not all that great a tool for it. Things on the other hand is great. The UI is very pleasing to the eye and the feature set is impressive; keyword tags, task grouping, teamwork management (add those you work with to the program so you can assign tasks to them and collaborate on tasks), and good filtering. The program really lets you get a good 'big picture' view of all the things you need to get done and helps you plan so you don't feel overwhelmed.
Another great upcoming feature is that it will be available to run on the iPhone and other mobile devices soon. Get it now while it is still free (the first full release will be out soon and will cost a small bit).
For all the Windows users out there you are stuck using Outlook. Bleh.
Sunday, April 6, 2008
HDR Imagery
There were a few classes at Photoshop World that made me want to open up Photoshop and try out the new techniques they were teaching. The class that blew me away was Ben Willmore's HDR Imagery class. I went out yesterday afternoon and shot some multi-exposure photos to play with HDR techniques. I tried a wide range of things to see what worked and what didn't.
I am honestly amazed at the results. The photo below is the second one that I processed following the tips learned from Ben's class. Let me know what you think of the technique.

I am honestly amazed at the results. The photo below is the second one that I processed following the tips learned from Ben's class. Let me know what you think of the technique.

Saturday, April 5, 2008
Photoshop World Overview
 Photoshop World 2008 in Orlando is officially over. The last few classes and the large 'wrap up' gathering took place yesterday afternoon. My overall opinion of the conference is extremely positive with a few sore spots; namely my feet, back, shoulders, brain, and wallet.
The first three sore spots came about from the excessive walking over the last three days, two of which I was dump enough to carry my laptop, work book, and all my camera gear around with me. There was no time to use my camera equipment and no free internet service to make having my laptop worth it. My brain is sore from trying to soak up so much information in such a little amount of time. This is where I say how thankful I am that they give you a work book that contains the instructors lesson for every class at the conference. So I can actually review all the classes I took to pick up on the things I forgot and also go through the classes I didn't take and still get the knowledge out of it. My wallet is sore from the convention center rip off prices that we endured... $10 a day for parking with NO re-entry, $10 for a flat tasteless cheeseburger, $4 for a bottle of water, etc. Anyone who has been to a conference before knows what I am talking about.
So this brings about my "Attending Photoshop World Tips & Tricks" lesson for this morning...
- Wear comfortable shoes!
- Don't bring lots of stuff with you; you won't have time to use it.
- Bring your own snacks and carry a water bottle that you can refill at water coolers.
- Prepare your body to run on little to no sleep during the length of the conference.
- Bring a notebook and a few pens; the work book has limited room for notes and people will beg you to borrow a pen.
- Be ready to meet cool people and be amazed at what the pro's are teaching.
After the conference was over and my wife and I were in the car heading home telling each other various things we each learned in the classes we took. Once we got home and settled in I couldn't help but fire up Photoshop and test out a few of the things I learned. I took one of the photos in my portfolio that I had processed just under a year ago and re-processed it from scratch using things I learned in Scott Kelby's 7 Point System class. The differences are amazing especially in the color and the image details.


Wednesday, April 2, 2008
Give Nerds a Mac and Stand By for Laughter
Today was the first official day of Photoshop World 2008 and it was a good day! The keynote speech was funny, interesting, boring, hilarious, and cool all in that order. To end the suspense about the title to this post, the NAPP boys made a movie for the keynote... a Star Trek themed movie. Hopefully it will be on You Tube soon but I do not see it on there yet. But let me tell you... give a group of nerds a Mac and you will get some really hilarious results!
The interesting part was a VP from Adobe showing off an early build of Creative Suite CS4. He didn't mention any kind of date or projection for when it will be out but based on previous released of CS versions I would guess it is still at least a year away. I have no basis other than opinion for that statement so take it with a grain of nothing. He also showed off the new web based version of Photoshop that has some features from photoshop and bridge but in an online format that is accessible via your web browser. It looks really sweet. If I didn't have the full extended version I would probably use it quite a bit.
The boring part was Adobe's announcement of the Lightroom 2 beta. It is open to anyone who currently has Lightroom 1. Now, the reason I said it was boring is only because I have no interest in Lightroom and it was the longest part of the keynote. I must say however that it does look like the added a LOT of stuff to the program and this is a huge update to it.
The hilarious parts were when the VP from Adobe and Scott Kelby presented various 'cracks' on each other. Apparently they have a long standing fued to mess with each other at these conferences. Everything from showing a morphed image of Kelby's face on a dogs body to a movie made up of various short clips making the VP sing a Boy George song. It was quite humorous.
The cool parts were the classes. Holy crap! There were only three time slots for classes today and my wife and I took separate classes to extend our coverage. We both are in awe at the shortcuts we learned today. Tasks that took us a long time to complete in the past now take a few minutes with the tricks these instructors showed up. Everything from adding lights to an image to removing the background from a subject without removing any strands of hair or details. Amazing stuff!! If you use any Adobe software and can get to Orlando tomorrow; I highly advise it!
I have been dying to bust out my camera and load up Photoshop to play with some of the stuff I learned today so I am outta here for now. I'll post more tomorrow. Got to make my friend in Rhode Island even more jealous. :)
Tuesday, April 1, 2008
Camera Bags, Forcefields, and Grumpy Salesmen

When I upgraded from the Canon Digital Rebel to the Canon 20D I bought a Hardigg Storm Case to protect it. At the time I was flying from Florida to Albuquerque on a weekly basis and wanted to make sure my investment was heavily protected. The Storm Case had a lot of appeal due to its hard outer shell, fully customizable interior, and waterproof seals. I still love it to this day. However, it is a bulky case that adds a lot of weight to your camera gear. It is not the best thing to carry around a theme park, in the woods, or to conferences.
Speaking of conferences, I leave tomorrow morning to attend Photoshop World 2008 in Orlando. Since I will want my camera and laptop on hand at all times during the show I finally decided (after at least two years of pondering the idea) to buy a soft sided camera bag that would fit most of my camera gear and my 15.4" MacBook Pro. As you can tell from the title and the above photo, I decided to get the Nikon Digital SLR & Laptop Backpack. I also looked at the Lowepro CompuTrekker AW and some random Tamrac bags but decided to go with the Nikon bag based on a variety of reasons. One of which will be the look of horror given to me by Nikon fan-boys when I pull my Canon 20D out of a Nikon bag! It's going to be a lot of fun. I asked the salesman if there was a forcefield on the bag that he needed to deactivate so I could put my Canon camera in it. He didn't even smirk at my great showing of geek humor! Oh well.
 While my humor may not be appreciated by grumpy old salesmen, this bag can be appreciated by most photographers. The things that sold me on it while in the store were its weight, size, and pocket layout. As you can see from the photo on the left, it has two main pockets on the face of the bag (upper and lower), one side pocket on each side of the bag, and the laptop bag which is at the 'back' of the bag accessible from the top. Every compartment has a net pocket in it and the side pockets each have a total of three pockets. The upper pocket on the face is laid out for a SLR body with a small lens attached. The lower pocket on the face has padded dividers that can be moved around to create multiple 'slots' of different sizes. Finally, the bag weighs just over 3 pounds and is quite comfortable to wear.
Once I got it home and started adding my camera gear to it that I realized that this bag is very hacker friendly. All of the dividers are padded and have velcro on the ends so you can move them around however you like. In fact, if you remove ALL the dividers then the entire bag (except for the laptop compartment) is just one big compartment; even the side pockets are part of the main bag space. Two padded dividers span the sides to create the individual side pockets. They fit in so well that I didn't realize this in the store. Another divider is used to divide the upper face pocket from the lower face pocket. This made a huge difference for me because my Canon 20D with my primary lens (28-135mm IS) attached would not fit into the upper pocket with its original size. While the vertical divider in the lower face proved to be a bit of a pain when trying to move the 'floor' of the upper face down to make room for it, I was able to get it all to fit after a little finesse. Another really cool part of this bag is a padded 'divider' with a circular hole in it that goes in the upper pocket. The lens pushes through the circular opening so that the weight of the body rests on this semi-divider instead of all the weight residing on the face of the lens! Other bags may have this but I didn't see any of the Lowepro's or Tamrac's with this in the store. Finally, I was able to customize the lens pocket to hold me other two telephoto lens as well as both of my Canon Speedlight 580 flashes. With the Master/Slave ability of these flashes I can now easily carry one for on-camera and one for off-camera use wherever I go.
The exterior of the bag itself is water-resistant and has straps along the face and sides that can be used to clip other gear to or strap a tripod onto it. I wouldn't try to strap a heavy duty tripod to it but my light weight tripod fits just fine. Even with all my gear in the bag, it doesn't stick out like a normal laptop backpack so its ergonomics are much better. If I still had my sport bike I would test its aerodynamics but my guess is that its cross section is much better than my old backpack and that should be good for a few mph gain! Oh, I also need to mention that the bottom of the bag has a hard shell covered with nylon to protect the gear in the lower compartment and the laptop. It is plyable so I wouldn't drop or kick the bag but it will do fine for any bumps or small accidents.

There isn't much to say about the laptop compartment. It is well padded and easily fits my 15.4" MacBook Pro with about 1.5 inches to spare. I seriously doubt you could fit a 17" laptop into this bag. There is plenty of space for the 'height' of a laptop but I don't think a Dell XPS laptop would fit since it is a fat pig. Besides, who would want to carry that kind of weight on them while shooting anyway? Its padding its thicker than the padding on my Targus backpack so I expect there to be less heat transfer to my back after sticking a hot laptop into it and putting it on.
Overall I think this is a great product. However, all I have done with it so far is load it up and carry it around the house. I am a bit hesitant to post this review until after I have carried it around Photoshop World for 3 full days but I feel the bag has a lot of merits based on its hacker friendly design and feature set to warrant an early posting. If I run into any 'field issues' with it during the conference I will be sure to update this post and provide the details.
Sunday, March 30, 2008
Current Environment
I think the best thing to discuss right off the bat is the hardware and software environment that I have put together. As I had mentioned before, the main requirement that I had when switching to the OS X platform was that I couldn't lose any functionality of my Windows XP and Vista platforms. I had to be able to continue working on my engineering and photography tasks without any hiccups. Believe it or not, meeting this requirement was quite easy and I had accomplished it within two days of having the Mac in my possession. So, without further delay, here is the line up...
HARDWARE

I have always preferred a laptop over a desktop for work tasks. It allows me the freedom to work wherever I want and also allows me to take it to any meeting or event I plan on attending. Since I was already set on leaving the WinWorld and going to Mac this made the choice pretty simple; MacBook or MacBook Pro.
I was sold on the MBP almost immediately based on the fact that the MB only has a 13 inch screen whereas the MBP has the 15.4 or 17 inch screen. I have had a 13 inch screen before and also a 17 inch widescreen before and neither were ideal. The 15.4 inch screen is perfect. I went with the base model in the MBP line based on cost; my wife got one at the same time so Apple shareholders were very happy with me that week!
Along with the 15.4 inch screen I got the standard 2.4GHz Intel Core 2 Duo, 2GB memory, and upgraded to the 250GB hard drive. The last thing to decide on was whether to get the matte or glossy screen. After comparing two laptops I had I decided I really like to glossy screen for photography work. The colors are more rich (especially the blacks) and the contrast seems to be a bit higher. Overall I just think it has a better look to it. However, it does have a lot more glare than a matte screen but it never bothered me with my old laptop and doesn't bother me now.
SOFTWARE
When I started looking into software solutions to my problems I decided that I wanted to run as much of it on OS X as possible. I knew I was going to need a virtual machine solution for my build environment but I did not want to rely on it for anything more than just the builds. The following paragraphs list out each solution I have decided to use up to this point.
VMware Fusion: The build environment that I deal with at work is a two part environment; one part on Windows XP using Visual Studio 2005 and the other part using a custom tool chain based around GCC on Linux. I heard nothing but good things about both Parallels and VMware but decided to go with VMware. With this I can run two virtual machines, one Windows XP SP2 and one Ubuntu 7.10, and get all the functionality I need on the Mac. After running the builds in the VM's I found that the speed was quite comparable to running on a true XP machine so the virtualization does not sacrifice any performance! I was happily surprised.
Microsoft Office 2008 for Mac: I was very displeased with Office 2007 for Windows. The new UI was a pain to use and I just had an overall displeasure using it. I looked into some alternatives to Office but ended up sticking with the giant. To be completely honest, I was extremely surprised with this software suite. From the second I got my Mac I was amazed at how nice and polished everything looked. Office 2008 for Mac continued on with that trait. Everything from the tool pallets (sidebars / toolbars on Windows) to the opening splash screen looks so much better than the Windows versions. All the annoying UI components in Office 2007 for Windows do not exist in Office 2008 for Mac. The UI is very different, which is to be expected, but they are very easy to use and after writing a two page document I have become accustomed to them. All I can say is that Office 2008 for Mac is the best Microsoft product I have used in a long time.
Perforce: The company I work for uses Perforce as our source control management solution. So I had to go with Perforce. As I said above, I wanted to use everything on Mac as possible so I went with the Mac version. Nothing to report on this topic other than that it works just fine. The problem that I have is that my company only has a Windows based VPN solution so I can only connect to the work servers from home using the Windows virtual machine. So I will eventually need to install the Windows version in the VM to manage source control from outside of the office. While I am at the office the OS X version works just fine.
Adobe Creative Suite 3: I have found that CS3 runs a heck of a lot faster on OS X then it does on Windows Vista. Not just a little faster... MUCH faster. Program open times and applying filters to large image files in Photoshop only takes a fraction of the time it took on Vista. I am extremely pleased at the performance on OS X and will continue to sing praises for CS3.
Chicken of the VNC: A great VNC program for OS X.
Cyberduck: A great FTP program for OS X.
These are just the main programs that I have installed over the last few weeks to solve various tasks that I perform on a daily basis. There are a lot of other great applications out there for OS X that I haven't needed yet but will download eventually. A basic Google search will turn many of them up. There are also a lot of applications that came with OS X Leopard that I use daily; Mail.app, iCal, Address Book, and iTunes to name a few. I couldn't live without my browser extensions so I did install Firefox for my web browsing instead of using Safari. Nothing against Safari of course... I just love Firefox.
So this should give you a pretty good baseline on the software that I am using to perform all the things I do in both engineering and photography on the Mac. It has been three week since I made the switch to Mac and I haven't looked back once yet. In fact, after getting all the files off of my Vista laptop it has sat under my coffee table (yes, the symbolism is wonderful isn't it?) awaiting its eventual listing on eBay.
Are you an OS X user with a great hint or tip on must have software? If so, let me know!
Word of Advice for Photoshop Beginners
Yesterday I met with a girl that modeled for me many years ago when I was just getting started with professional photography. She recently got engaged and wants to hire me to do a photo shoot for her and her fiance so they have nice photos to send with their engagement announcements. During our meeting I showed her my updated portfolio and we talked a bit about the various compositions I could do for her using Adobe Photoshop CS3. She made a comment about how much of a difference she could see from the photo shoot we had done together many years ago and some of my most recent work. Other than being a nice boost to my ego it made me think about how much I knew about photography and Photoshop back then and how much I know now. After the meeting I went back and looked at the compositions and editing I have done over the years and it made me realize how much time I wasted as a beginner. Many of the things I had done in the past that took me countless hours only takes me a few minutes now. While some of this is just familiarity with the software, much of it has to do with learning techniques.
So, about that word of advice to those Photoshop beginners out there... Do yourself and your clients a big favor and spend some time learning how to use layers. I do not mean just using them... I mean how to **REALLY USE** them! There is a lot to learn about Photoshop's implementation of layers and they are an extremely powerful tool. Most importantly, learn how to use layers, layer masks, and blend modes. If you couple these items with any of the other features in Photoshop, you will save you so much time and produce much higher quality work that ever before.
Now that I have convinced you to look more into layers and techniques, I will give you some resources to help.
 1. Matt Kloskowski recently published a new book that is dedicated to layers; Layers: The Complete Guide to Photoshops Most Powerful Feature. It is simply amazing and a must read for anyone that wants to know how to use Photoshop well. I consider myself to be a fairly advanced Photoshop user (I put Kelby, Kloskowski, Cross, Versache, Vanelli, etc.) in the 'Photoshop Gods' category so I can call myself advanced) and I learned a lot of new tricks from this book. Speaking of Scott Kelby, his books on Photoshop and photography are well worth having.
2. Subscribe to iTunes podcasts dealing with Photoshop Tips & Tricks. I recommend the following free podcasts (search the iTunes podcast list):
5. Practice, Practice, Practice. I know it is a cliche but had to be said. You can watch all the podcasts in the world but without actually taking photos and playing with them in Photoshop you are not going to develop the skill to do well at it.
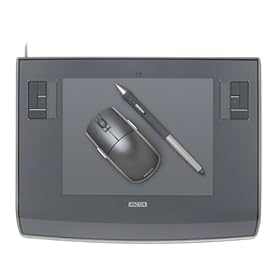
 Last but not least, I highly suggest that you get a Wacom Intuos3 tablet. My first tablet was a Wacom Graphire3 of the type they no longer make. It worked great but once I started using Photoshop the way it was meant to be used, I had to upgrade. The Intuos3 opens up a lot of cool features that are easy to use; pen tilt and pressure sensitivity to name a few. While the use of a tablet deserves a separate post of its own (which I may do in the near future), I had to mention it here. It really does give you a huge advantage over photographers and graphic designers who don't use one. Of course, if you have the money to get the even higher grade Wacom tablets, go for it. Send me one while your at it!
So, about that word of advice to those Photoshop beginners out there... Do yourself and your clients a big favor and spend some time learning how to use layers. I do not mean just using them... I mean how to **REALLY USE** them! There is a lot to learn about Photoshop's implementation of layers and they are an extremely powerful tool. Most importantly, learn how to use layers, layer masks, and blend modes. If you couple these items with any of the other features in Photoshop, you will save you so much time and produce much higher quality work that ever before.
Now that I have convinced you to look more into layers and techniques, I will give you some resources to help.
1. Matt Kloskowski recently published a new book that is dedicated to layers; Layers: The Complete Guide to Photoshops Most Powerful Feature. It is simply amazing and a must read for anyone that wants to know how to use Photoshop well. I consider myself to be a fairly advanced Photoshop user (I put Kelby, Kloskowski, Cross, Versache, Vanelli, etc.) in the 'Photoshop Gods' category so I can call myself advanced) and I learned a lot of new tricks from this book. Speaking of Scott Kelby, his books on Photoshop and photography are well worth having.2. Subscribe to iTunes podcasts dealing with Photoshop Tips & Tricks. I recommend the following free podcasts (search the iTunes podcast list):
- Photoshop User Tv - Scott Kelby, Matt Kloskowski, and David Cross
- Photoshop Killer Tips - Matt Kloskowski
- Photoshop for Digital Photographers - Michael Rather
- Peachpit Press - Tips, Techniques, and Tricks from Matt Kloskowski
- Scott Kelby Blog - Basic news relating to Photoshop and photography in general
- David Cross Online - Basic news relating to Photoshop and photography in general
5. Practice, Practice, Practice. I know it is a cliche but had to be said. You can watch all the podcasts in the world but without actually taking photos and playing with them in Photoshop you are not going to develop the skill to do well at it.
 Last but not least, I highly suggest that you get a Wacom Intuos3 tablet. My first tablet was a Wacom Graphire3 of the type they no longer make. It worked great but once I started using Photoshop the way it was meant to be used, I had to upgrade. The Intuos3 opens up a lot of cool features that are easy to use; pen tilt and pressure sensitivity to name a few. While the use of a tablet deserves a separate post of its own (which I may do in the near future), I had to mention it here. It really does give you a huge advantage over photographers and graphic designers who don't use one. Of course, if you have the money to get the even higher grade Wacom tablets, go for it. Send me one while your at it!
Friday, March 28, 2008
Declaration of Purpose
Looking back over the years I can count the number of blogs I have created on one hand. I can also count the number of posts in each of them on one hand. The only exception is a LiveJournal account that I have, surprisingly enough, maintained quite well for the last few months. However, my latest idea for a blog doesn't seem to fit the LJ environment very well so I went in search of something better. I was going to create a Word Press blog site of my own but decided that the amount of money and work involved in designing it to my liking was not to my liking. So... a new blogger.com user I became.
The idea that I had for a blog came out of a belief that many engineers, myself included, have had for many years; that Apple computers are no good for engineering. I admit that I was part of the crowd that dismissed the idea of buying a Mac without a second thought simply because I believed that they were only good for two things; photo and video editing. I must also admit that, while this belief may have been correct many years ago, it is NOT correct anymore. So the idea was to create a blog to discuss my use of the Mac to perform various engineering tasks (mainly software development) that are still based on a work environment of Windows and Linux.
I started to research the capabilities of the Mac and OSX Leopard a few months ago after finally giving up on Microsoft Vista. I bought a HP "Vista Ready" laptop just over a year ago when my Dell Windows XP SP2 machine developed multiple vertical lines on the screen. I am not sure if it was because Vista looked really cool or if I was just happy to have a new computer but I really liked Vista at first. It took a little getting used to but I started telling people how cool it was soon after buying it. But then I started installing programs on it and watched the performance of the machine crash. It started running so slow that I had to turn Aero (the fancy 3D-ish UI) off just so I could use the thing. And yes, I know how to maintain a computer so don't bother using the "your too stupid to own a computer" excuse to argue that Vista is so great.
What I found in my research convinced me to make the switch from Microsoft Windows XP & Vista over to OS X Leopard. I recently purchased a new Intel chip based MBP (MacBook Pro) and have been using it for about two weeks now. When I first decided to switch I promised myself that I would go into this with an open mind so I wouldn't get caught like I did with Vista. I must say that it has been getting harder and harder to keep an open mind since getting my MBP. It has been nothing but a joy to use and I have been able to do everything I could on Vista plus more.
So the general idea for the blog was to discuss various engineering topics and how I handle them using the Mac in order to show other engineers that the Mac platform is a good alternative to the nightmare that is Microsoft Vista. However, I have decided to expand the idea slightly to include various topics relating to my photography as well. I will categorize every post using labels so readers can easily filter out the stuff they don't really care to read.
Let the fun begin.
Subscribe to:
Posts (Atom)